Setup SMTP Outbound Server with DKIM

In this guide I am setting up an Incus container for SMTP using Debian Bookworm. I will be installing Postfix for SMTP and OpenDKIM for signing emails. This is to setup an SMTP outbound server that can act as a relay for all your Incus LXC & OCI containers, and VMs. I have tested sending to Google’s servers and it passes all checks.
Preparation
On the host create the container and enter the shell of the container.
1
2
incus launch images:debian/12 smtp
incus exec smtp bash
Install mailutils which includes useful tools for diagnosing email issues i.e. mail, which is the standard /bin/mail interface, mail sender and reader. I recommend installing rsyslog as this will captures logs from postfix.
1
apt install mailutils
Install Postfix
1
apt install postfix
As part of the installation you will be presented with some questions about how you would like to use postfix. The first one is the following:
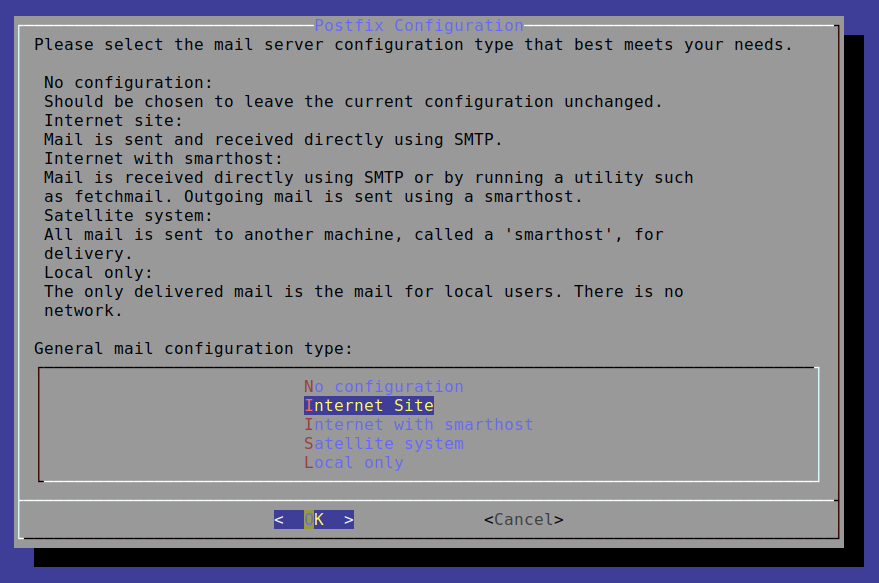
You will be configuring the SMTP server as an Internet Site, which should already be selected. Select OK.
You will then be presented with the following:

Based on the message, you should be able to figure out how you want the mail name set. It will most likely be your root domain. Select OK.
At this point you have completed the install of Postfix
Configure Postfix
Edit /etc/postfix/main.cf and change the lines as shown here. Replace your domain as needed. To understand this better go look at main.cf parameters.
1
2
3
4
5
6
7
8
9
10
11
12
13
14
smtpd_relay_restrictions = permit_mynetworks permit_sasl_authenticated defer_unauth_destination
-myhostname = hostname
+myhostname = smtp.example.net
alias_maps = hash:/etc/aliases
alias_database = hash:/etc/aliases
myorigin = /etc/mailname
mydestination = $myhostname, localhost.$mydomain, $mydomain
relayhost =
-mynetworks = 127.0.0.0/8 [::ffff:127.0.0.0]/104 [::1]/128
+mynetworks = 127.0.0.0/8 [::ffff:127.0.0.0]/104 [::1]/128 10.10.10.0/24 [2001:db8:b00b:b00b::]/64
mailbox_size_limit = 0
recipient_delimiter = +
inet_interfaces = all
inet_protocols = ipv6
Configuration Descriptions
It is best to set myhostname to the FQDN you will be using in DNS for both A/AAAA and PTR records. This can help keep your SMTP server off spam denylists.
mynetworks has to have all the IPs or IP ranges that will be using this server as a relay. In my example I am using my Incus IP ranges for both IPv4 and IPv6. Obviously that is not my IPv6 range (I just like b00b) that I use with my Incus setup.
I also wanted to configure this as an IPv6 only SMTP server, so I have inet_protocols set to ipv6. Most of the time you will want to set this to all.
Install & Configure OpenDKIM
Install
1
apt install opendkim opendkim-tools
Edit /etc/opendkim.conf to reflect the changes here. All changes are explained below
Configure
1
2
3
4
5
6
7
8
9
10
11
12
13
14
15
16
17
18
19
AutoRestart			yes
AutoRestartRate			10/1M
UMask				007
Background			yes
Syslog				yes
SyslogSuccess			yes
LogWhy				yes
DNSTimeout			5
Mode				s
SubDomains			no
OversignHeaders			From
UserID				opendkim:postfix
Socket				local:/var/spool/postfix/opendkim/opendkim.sock
PidFile				/run/opendkim/opendkim.pid
SignatureAlgorithm		rsa-sha256
InternalHosts			refile:/etc/opendkim/internal.hosts
ExternalIgnoreList		refile:/etc/opendkim/internal.hosts
KeyTable			refile:/etc/opendkim/key.table
SigningTable			refile:/etc/opendkim/signing.table
You can name each of the files under
/etc/opendkim/to anything you please. You need to make sure that you use the same names with each of the files edited throughout this guide.
Configuration Descriptions
- AutoRestart: Indicate whether or not the filter should arrange to restart automatically if it crashes.
- AutoRestartRate: Sets the maximum automatic restart rate. See the opendkim.conf(5) man page for the format of this parameter.
- UMask: Change the process umask for file creation to the specified value. The system has its own default which will be used (usually 022). See the umask(2) man page for more information.
- Background: Indicate whether or not the filter should run in the background.
- Syslog: Log informational and error activity to syslog.
- SyslogSuccess: Log success activity to syslog
- LogWhy: detailed logging about the logic behind the filter’s decision to either sign a message or verify it.
- Canonicalization: Select canonicalizations to use when signing. If the “bodycanon” is omitted, “simple” is used. Valid values for each are “simple” and “relaxed”.
- ExternalIgnoreList: Names a file from which a list of externally-trusted hosts is read. These are hosts which are allowed to send mail through you for signing.
- InternalHosts: Names a file from which a list of internal hosts is read. These are hosts from which mail should be signed rather than verified.
- KeyTable: Defines a table that will be queried to convert key names to sets of data of the form.
- SigningTable: Lists the signatures to apply to a message based on the address found in the
From:header field. - Mode: Indicates which mode(s) of operation should be provided.
smeans sign,vmeans verify. We only needvbecause this is for outbound SMTP only. - PidFile: Name of the file where the filter should write its pid before beginning normal operations.
- SignatureAlgorithm: Signature algorithm to use when generating signatures.
- UserID: The opendkim process runs under this user and group.
- Socket: Names the socket where this filter should listen for milter connections from the MTA. I have left this as the default, since Postfix is on the same container.
More configuration options are shown in the opendkim.conf.sample.
Configure Postfix to Use the Milter
In a lot of the guides I came across, there is instructions to edit
/etc/default/opendkim. This is no longer required and the following is stated in that file.
Create & Configure Keys
Create the necessary directories. The flag -p creates missing intermediate directories as well i.e. it will create the opendkim, keys, and example.net directories.
1
mkdir -p /etc/opendkim/keys/example.net
Now create and edit /etc/opendkim/internal.hosts.
In this file you need to create hosts that will be allowed to sign emails. This should just be the local server as everything is relayed.
I have the following because I am sending emails from other containers in my Incus host.
1
2
3
4
127.0.0.1
localhost
[::1]
.incus
I have tested this and the only way the emails are signed is if .incus is included in the InternalHosts configuration for OpenDKIM.
Next we will generate the key for use with signing emails. To do this we use opendkim-genkey.
I have used smtp as the selector for my DKIM key. This is the first part of your DNS TXT record associated with DKIM i.e. smtp._domainkey.
1
2
cd /etc/opendkim/keys/example.net
opendkim-genkey -s smtp -d example.net
Now you need to give opendkim ownership of the private file created.
1
chown opendkim: smtp.private
You do not need to enter
opendkim:opendkimyou only need to place the colon and it will set the group as the same name.
Now you can view the created DKIM key for use in DNS.
1
cat /etc/opendkim/keys/example.net/smtp.txt
Which will output something like this.
1
2
3
4
smtp._domainkey	IN	TXT ( "v=DKIM1; h=sha256; k=rsa; "
"p=MIGfMA0GCSqGSIb3DQEBAQUAA4GNADCBiQKBgQDLPQMQ0i1quDOFZXJF8qnI/gt/
yxJEa2N8mk2Gkvhd2otV0la2JiuzQvpvY7HLMgfEt288a2kfnrHi7njvThLlFWMq"
"rzTGYRrQ8sBfwnmkxjeirlyuSOMfP2s3S1HkFLsD1m+uZ5707N+KoY9hKlKibpm6IavPRIryBPQ2IP/wmQIDAQAB" )  ; ----- DKIM key smtp for example.net
I had to tidy this up a bit before creating the TXT record on my DNS server. The quotes should only be around the entire data for the record. It should be a single line like this:
1
"v=DKIM1; h=sha256; k=rsa; p=MIGfMA0GCSqGSIb3DQEBAQUAA4GNADCBiQKBgQDLPQMQ0i1quDOFZXJF8qnI/gt/yxJEa2N8mk2Gkvhd2otV0la2JiuzQvpvY7HLMgfEt288a2kfnrHi7njvThLlFWMqrzTGYRrQ8sBfwnmkxjeirlyuSOMfP2s3S1HkFLsD1m+uZ5707N+KoY9hKlKibpm6IavPRIryBPQ2IP/wmQIDAQAB"
Next we need to configure the KeyTable. We edit the file /etc/opendkim/key.table. This defines private keys and their corresponding selector.
1
smtp._domainkey.example.net example.net:smtp:/etc/opendkim/keys/example.net/smtp.private
Now we need to configure the last file for opendkim. Edit /etc/opendkim/signing.table by telling it which signing key it should be using for the email domain sending through postfix.
1
*@example.net smtp._domainkey.example.net
To make sure that opendkim can start the socket we need to create a directory and modify some permissions. Once that is done we need to restart opendkim and postfix.
1
2
3
mkdir /var/spool/postfix/opendkim
chown opendkim:postfix opendkim
systemctl restart opendkim postfix
At this point everything should be working and you should be able to set smtp.incus as your SMTP server on other containers on your host.
Don’t forget to add your IP addresses to your SPF record.